
Shopify is my top-rated e-commerce platform, not simply based mostly by myself analysis but in addition backed by robust opinions from real-world customers and trade specialists. For those who’re prepared to begin promoting on-line however aren’t certain the place to start, I can confidently say that Shopify makes the method extremely easy, even in case you have zero technical expertise.
On this step-by-step information, I’ll stroll you thru precisely the way to create a Shopify retailer, from choosing a theme and including merchandise to establishing funds and getting your retailer able to launch.
Step 1: Join Shopify
Begin by heading to Shopify.com and clicking on Begin free trial. Shopify provides a three-day free trial and a $1/month deal for the primary three months on choose plans. I personally discover it nice for testing the waters with out a massive dedication. You want at the least that period of time to see if the platform is an efficient match for what your e-commerce enterprise wants.
When you click on on the Begin free trial button, you’ll have to enter your e-mail handle and choose a password. It’s also possible to select to reply just a few brief questions on your online business or skip that altogether. Moreover, you’ll be prompted to join a plan — you don’t have to pay for the $1/month deal proper now. You’ll obtain an e-mail to enroll earlier than your three-day free trial ends.
The sign-up course of ends with a setup information. This may present in your Shopify dashboard till all of the steps are accomplished.
💡 Tip: Don’t overthink the shop title proper now — you may change it later. Concentrate on getting contained in the Shopify dashboard, the place the true setup occurs.
Step 2: Arrange your retailer’s particulars
When you’re contained in the Shopify admin (your backend dashboard), go to Settings > Basic. That is the place you’ll enter necessary info like your retailer particulars and defaults. Enter your billing handle and arrange your time zone, default forex, and weight unit.
The default forex is the forex by which your costs can be listed (like USD, EUR, or GBP). Be certain that this matches your major buyer base.
💡 Tip: For those who’re promoting B2B, Shopify Plus permits you to customise pricing by buyer group and provide wholesale reductions mechanically.
Step 3: Select and customise a theme
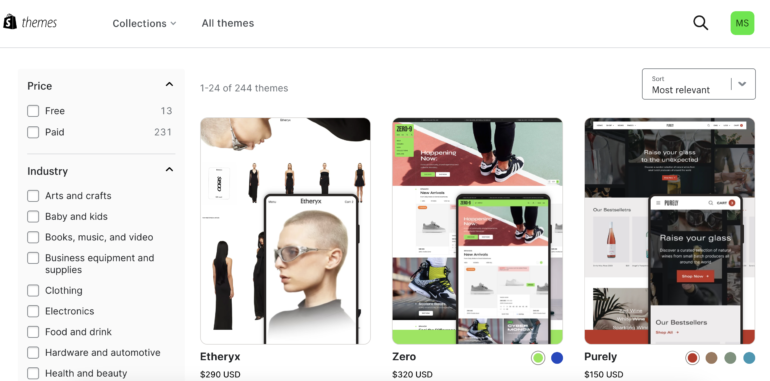
Now comes the enjoyable half — designing your retailer. Head to On-line Retailer > Themes, the place you’ll discover free and paid themes. A theme controls how your retailer appears to be like: format, fonts, colours, and so on. Consider it because the place the place you arrange your web site.
When you see the web page for Themes, click on Customise in your theme to tweak the homepage, add your emblem, or change the colour scheme to match your model. You may see the place to click on within the picture beneath.
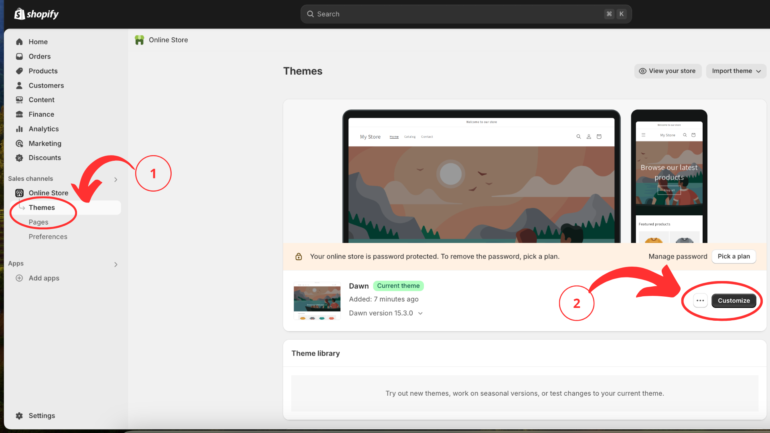
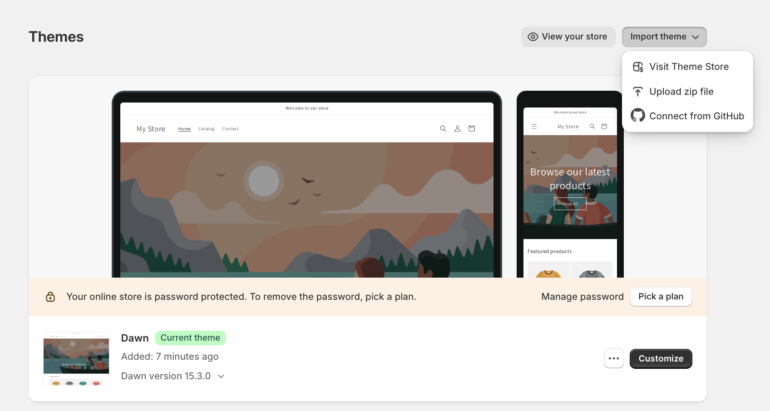
Select a easy theme to begin — Debut or Daybreak are nice free choices. You may at all times change or improve it later. If you wish to discover the obtainable themes, click on on Import Theme > Go to Theme Retailer.
What’s nice about Shopify’s themes is that they’re all mobile-first, which means they’ll look good on telephones and tablets, too. Cell-first web site templates are essential on your on-line retailer. Nearly all of consumers now browse and purchase instantly from their telephones. Cell-first templates guarantee your website masses rapidly, appears to be like clear, and capabilities easily on smaller screens — enhancing consumer expertise and boosting conversions. Plus, search engines like google and yahoo like Google prioritize mobile-friendly websites, so it could assist your retailer rank increased in search outcomes.
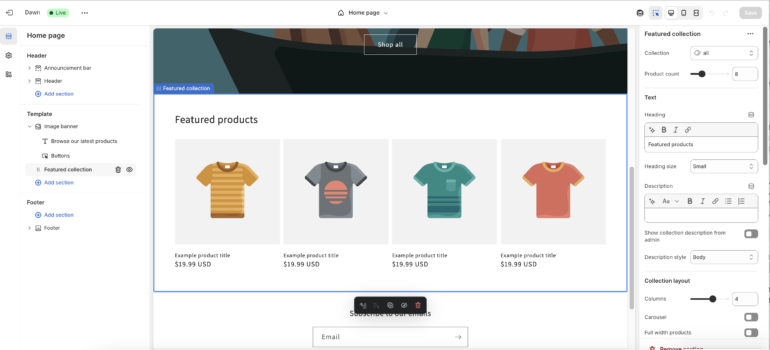
When you select a theme, you may take it a step additional by customizing it to your model. To do this, observe these steps:
- Open the Theme Editor: Go to On-line Retailer > Themes in your Shopify admin. Click on Customise subsequent to your lively theme.
- Edit sections and blocks: Add, take away, or rearrange sections and blocks for every web page. Click on a bit title within the sidebar to regulate its content material and settings.
- Use theme settings: Change colours, fonts, and format types from the Theme settings tab.
Alternatively, you may click on the three dots subsequent to your theme and choose Edit code in case you want superior modifications not obtainable within the editor and know the way to code.
Don’t overlook to click on Preview to see your modifications reside. Hit Save to use your updates.
Step 4: Add merchandise
Now that your storefront design is dialed in, it’s time to inventory the cabinets. You’ll add product listings out of your Shopify admin or cell app — whichever works finest for you.
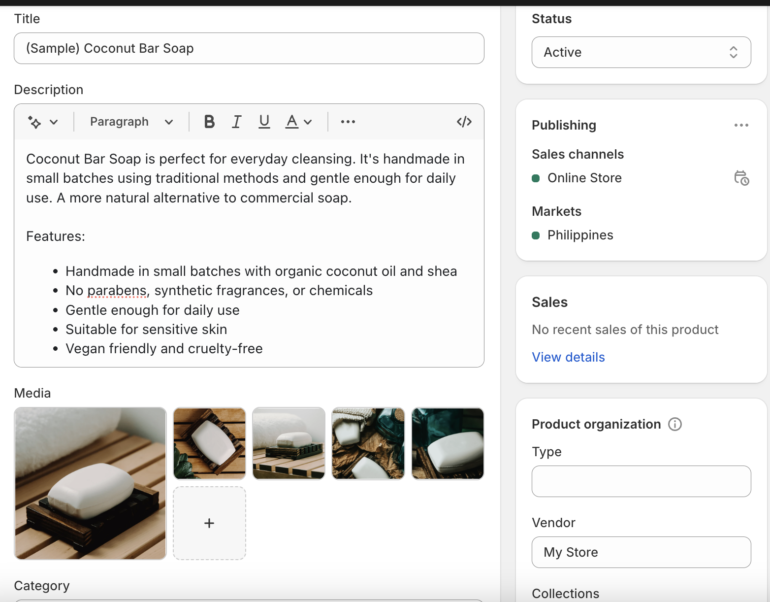
- Out of your Shopify admin: Click on Merchandise, then Add product. Fill in your product title, description, pricing, photographs, and extra. Click on Save to publish it to your retailer.
- From the Shopify cell app: Faucet Merchandise within the Shopify app. Faucet the + icon, then Add product. Enter particulars and faucet Save.
- Bulk add choice: Use a CSV file to import a number of merchandise directly — splendid for giant catalogs or transferring from one other platform.
Every product in Shopify will get its personal product particulars web page — that is the place your buyer decides to purchase. That is the core of your product presentation. Hold it clear, compelling, and useful to information your buyer to checkout.
- Title and outline
- Media gallery (photographs, movies, or 3D fashions)
- Worth, compare-at worth, and any obtainable reductions
- Stock particulars, together with SKU and barcode
- Variants like sizes or colours
- Delivery and weight data
- Metafields for customized content material
- Search engine itemizing preview to edit search engine optimization metadata
That will help you create high quality and sales-converting product listings, listed below are just a few ideas:
- Write robust, distinctive product descriptions: Keep away from producer copy. Use bullet factors, wealthy textual content formatting, and key phrases to assist with search engine optimization.
- Add high-quality media: Crisp images or brief movies assist construct purchaser confidence. Guarantee photographs look nice on each desktop and cell.
- Set clear costs and stock: Add base costs, use compare-at worth for reductions, and observe inventory portions precisely.
- Group with collections and tags: Use collections (e.g., “Greatest Sellers” or “Summer season Favorites”) for navigation and tags for filtering and search.
- Use metafields for further data: Add customized content material like ingredient lists or care directions and join it to your theme.
- Edit search engine optimization settings: Scroll all the way down to the search engine itemizing preview and tweak the title and meta description to enhance visibility on Google.
If you’re fighting producing product copy, Shopify has a built-in AI generator referred to as Shopify Magic that may create product descriptions from the prompts or key phrases you provide. It’s also possible to specify the tone you need for it.

Your product pages are the place choices occur, so this step is definitely worth the time. When you’ve added just a few listings, we’ll transfer on to establishing funds.
Step 5: Arrange your cost gateway
As soon as your merchandise are reside, you’ll wish to receives a commission — that is the place establishing a cost gateway is available in. A cost gateway is the service that securely processes bank cards, digital wallets, and different types of cost on your retailer.
Right here’s the way to do it:
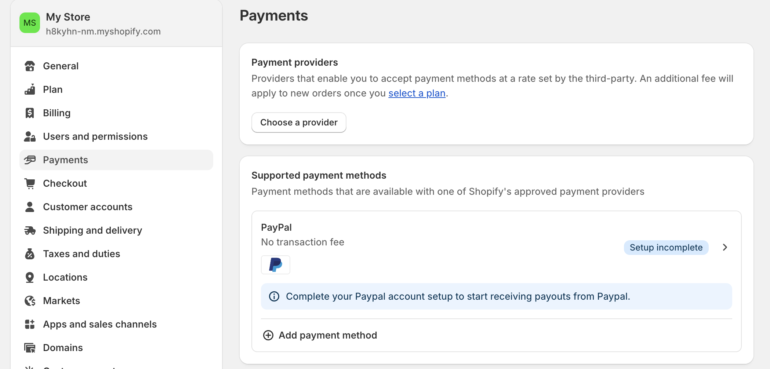
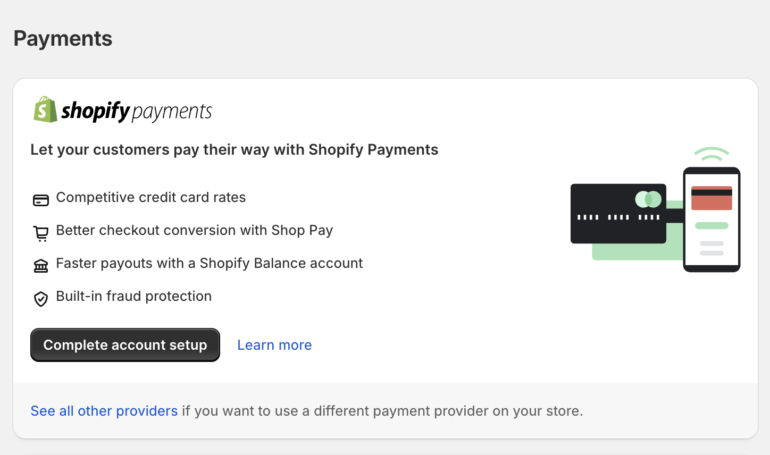
- Entry cost settings: Go to Settings > Funds in your Shopify admin.
- Select your cost supplier: Click on Select a supplier. Choose from the listing of obtainable suppliers (you may filter by nation, e.g., United States). Shopify Funds is normally the simplest choice. Whether it is obtainable in your promoting nation, it allows you to handle all the things from one dashboard and avoids further transaction charges.
- Arrange your supplier: Enter your account credentials on your chosen cost gateway (like PayPal or Stripe).
Observe any further steps or verifications required by the supplier. - Activate and save: Click on Activate as soon as setup is full. Don’t overlook to hit Save to substantiate your modifications.
I like to recommend going with Shopify Funds as a cost gateway when you’re promoting on-line utilizing the platform, for the next causes:
- No further transaction charges: You gained’t pay Shopify’s customary fee charge on every transaction in case you use Shopify Funds. Nevertheless, in case you use a third-party gateway, Shopify prices an extra 0.5% to 2% per sale on high of what your supplier prices.
- Flat, predictable pricing: Shopify Funds has easy flat-rate charges (beginning at 2.9% + 30¢ per transaction on the Fundamental plan), with no month-to-month or setup prices past your Shopify subscription.
- Constructed proper into your dashboard: The whole lot — orders, payouts, chargebacks — is managed inside your Shopify admin. No leaping between platforms.
Shopify Funds is right for small companies as a result of it’s built-in, inexpensive, and made particularly for Shopify sellers. Nevertheless, if it’s not obtainable in your nation, connecting a dependable third-party supplier remains to be a straightforward and safe choice.
Subsequent up: let’s speak delivery so your merchandise can get the place they should go.
Associated reads:
Step 6: Configure your delivery settings
As soon as funds are in place, the following piece is getting merchandise to your clients. Shopify allows you to create customized delivery guidelines based mostly on location, worth, or product weight, and you’ll provide all the things from free delivery to real-time service charges.
Right here’s the way to get your delivery setup dialed in:
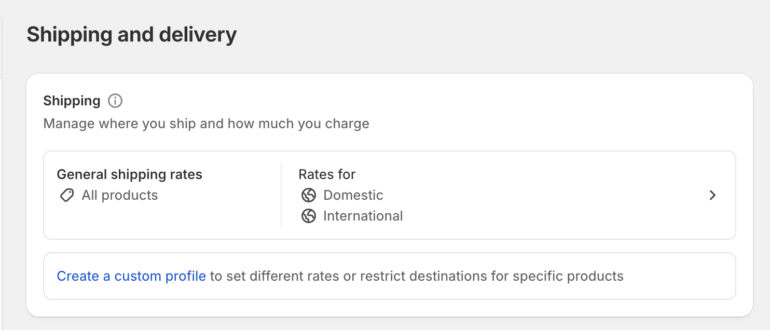
- Go to Settings > Delivery and supply in your Shopify admin.
- Click on Handle charges subsequent to an present delivery profile — or create a brand new one.
- You may construct a basic profile for many merchandise or a customized profile for gadgets with particular delivery wants.
Arrange delivery zones:
- Click on Create zone, title it, and choose the international locations or areas it applies to.
- For instance, you would possibly create zones for “U.S. solely,” “Asia,” or “Native supply.”
Add your delivery charges: For every delivery zone, click on Add charge and select the way you wish to cost:
- Flat charges: A set charge for any order (e.g., $5 customary delivery); that is finest for simplicity and price management.
- Basic charges: Supply totally different supply speeds (e.g., $5 customary, $15 categorical). Each choices present up at checkout for the client to decide on.
- Worth-based charges: Cost based mostly on cart whole (e.g., $4 below $50, free over $100). This feature is nice for incentivizing bigger orders.
- Weight-based charges: Use product weights to calculate delivery (e.g., $7 below 5kg, $15 over 5kg). This charge choice is ideal for bodily items the place weight impacts price.
- Free delivery: Set any charge to $0 to supply free delivery. I like to recommend combining this with a price-based rule to supply free delivery on orders over a certain quantity.

For those who’re on Shopify’s Superior or Plus plan, you may allow real-time service charges and hook up with companies like Canada Submit, FedEx, or USPS. Charges regulate dynamically based mostly on merchandise weight, field dimension, supply pace, and placement, which could be very helpful if you wish to go on actual delivery prices to the client. It’s also possible to add delivery charge apps from the Shopify App Retailer in case you want extra superior logic or regional suppliers.
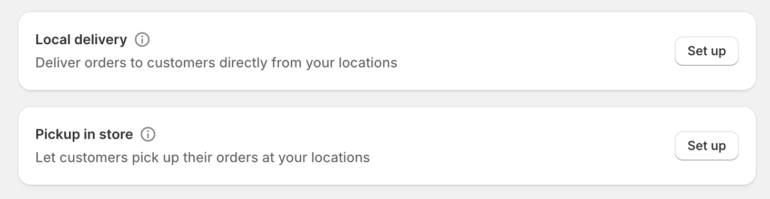
Supply native supply or pickup:
- Native supply: Arrange supply by postal code or distance radius, with non-compulsory supply charges and order minimums.
- In-store pickup: Let clients decide up their orders to avoid wasting on delivery — and also you management the pickup expertise.
Delivery is commonly the ultimate choice level earlier than buy—get it proper, and also you’ll cut back cart abandonment. Now let’s get your area title linked so you can also make your Shopify retailer really feel actually yours.
Step 7: Arrange your area
Your Shopify retailer comes with a default URL ending in .myshopify.com however to look skilled, credible, and construct belief together with your clients, you’ll need your individual branded area (like www.yourstorename.com). What’s nice is that Shopify makes it simple to both purchase a brand new area or join one you already personal.
Listed here are the choices to arrange a site with Shopify:
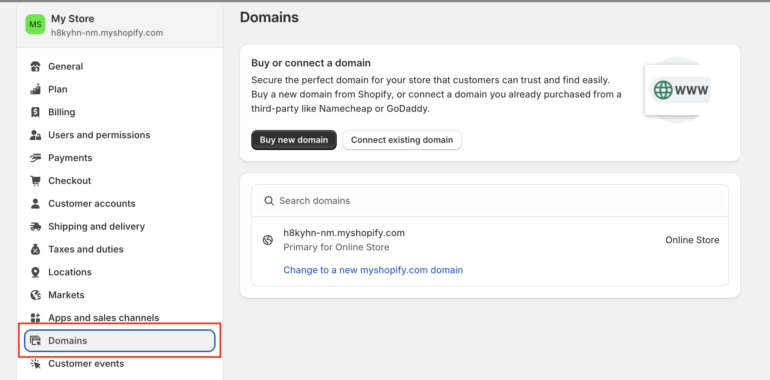
Possibility 1: Purchase a brand new area by means of Shopify.
That is the simplest choice as a result of all the things is dealt with for you. In your Shopify admin, go to Settings > Domains. Click on Purchase new area and seek for your required title. If it’s obtainable, observe the prompts to finish the acquisition.
As soon as purchased, Shopify mechanically units it as your major area (the one clients will see of their browser). You’ll handle all the things — renewals, settings, and redirects — from inside Shopify.
Possibility 2: Join an present area.
If you have already got a site from a supplier like GoDaddy, Namecheap, or Google Domains, go to Settings > Domains and click on Join present area. Enter your area (e.g., yourstorename.com) and click on Subsequent. You’ll see the next DNS directions:
- Level the A File to Shopify’s IP: 23.227.38.65.
- Level the CNAME File (for the “www” model) to: outlets.myshopify.com.
Log into your area supplier and replace these DNS settings. Return to Shopify and confirm your connection — it might take as much as 48 hours to totally join.
Possibility 3: Switch your area to Shopify (non-compulsory).
For those who’d relatively handle your whole area — billing, renewals, settings — proper from Shopify, you may switch your area. This feature is right in case you’re bored with juggling logins throughout totally different platforms.
You may add as much as 20 domains or subdomains (or 1,000 in case you’re on Shopify Plus). It’s also possible to add subdomains (like store.yourbrand.com) to make use of for campaigns or alternate storefronts. Even in case you purchase a number of domains (like .com, .co, or .retailer), you may have all of them redirect to your most important area. This retains your model protected and your guests touchdown in the proper place.
As soon as your area is ready and pointing to your retailer, you’re virtually able to launch! Subsequent, let’s stroll by means of the way to prep your website for its massive debut.
Step 8: Launch your retailer
You’re virtually there! Along with your merchandise, funds, delivery, and area arrange, it’s time to launch your Shopify retailer. However earlier than opening your digital doorways, let’s make certain all the things is operating easily with just a few last checks.
Check your retailer:
Earlier than eradicating password safety, simulate just a few buyer experiences:
Go to Settings > Funds > Shopify Funds > Edit and allow take a look at mode.
- Place take a look at orders to confirm that the checkout course of, cost settings, and delivery choices work appropriately.
- Use Shopify Funds take a look at mode to simulate each profitable and failed transactions (no prices apply).
- For those who’re utilizing one other cost supplier, use Shopify’s Bogus Gateway, or place an actual order and refund it instantly.
- Test stock updates, order success circulate, and tax calculations.
Don’t overlook to show it off if you’re carried out!
Do a final configuration verify:
- Affirm your delivery charges, tax settings, and cost gateways are all lively.
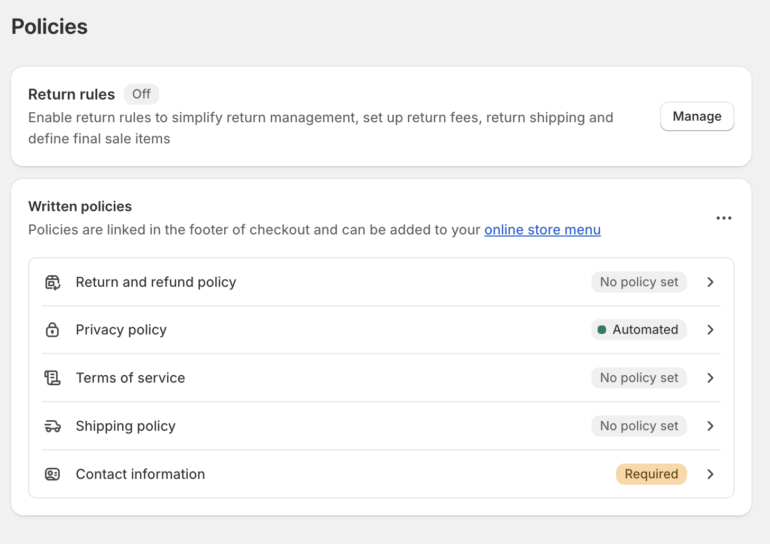
- Ensure you’ve added important retailer insurance policies (refund, privateness, phrases of service). Shopify has built-in templates below Settings > Insurance policies.
- Evaluate your storefront from a buyer’s perspective utilizing the preview instrument: Go to On-line Retailer and click on the attention icon subsequent to your theme.
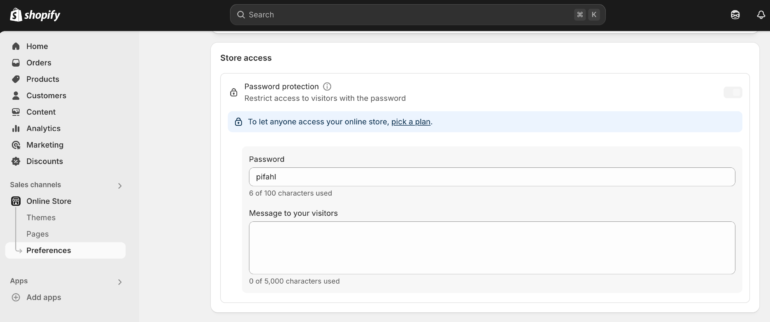
Take away password safety:
By default, Shopify shops are password-protected throughout setup. Once you’re prepared for the general public, go to On-line Retailer > Preferences. Scroll to Password safety. Uncheck Limit entry to guests with the password. Click on Save.
When you take away the password, your retailer is formally reside and open for enterprise. Subsequent, let’s dive into selling your retailer and bringing in these first clients.
Step: Promote your retailer
As soon as your Shopify retailer is reside, it’s time to shift gears — from constructing to selling. Fortunately, you don’t have to be a advertising knowledgeable to begin getting site visitors. Shopify consists of built-in instruments that will help you develop your viewers, automate your campaigns, and keep linked with clients — all out of your dashboard.
Right here’s the way to get began with Shopify’s built-in advertising instruments and extra:
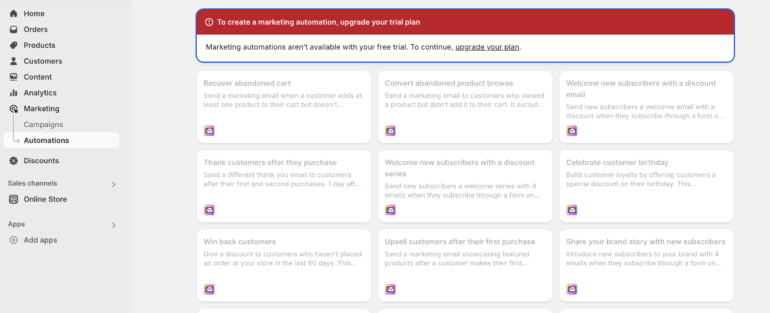
Use Shopify’s native advertising automation instruments
The whole lot it’s essential run efficient e-mail advertising is already in Shopify:
- Shopify E mail: Design branded emails and ship campaigns or automated follow-ups like welcome messages and deserted cart reminders.
- Advertising automations: Set off personalised emails based mostly on buyer habits, reminiscent of first-time purchases or product views.
- Shopify Varieties: Add pop-ups or embedded types to gather e-mail subscribers or wholesale inquiries. You may even provide a reduction code to encourage signups.
- Buyer segments: Create dynamic teams — like native consumers or excessive spenders —and ship focused emails only for them.
All of those instruments work collectively, so you may construct full e-mail funnels with out leaving your Shopify admin. Shopify handles analytics, too, so you may observe open charges, clicks, and gross sales tied to your emails proper contained in the Advertising dashboard.
Have interaction by means of social media
Social media is the place your model persona shines. Right here’s the way to benefit from it:
- Hyperlink your Fb, Instagram, or TikTok accounts utilizing Shopify’s built-in integrations.
- Share merchandise instantly out of your admin and sync your catalog to social platforms for shoppable posts.
- Attempt Instagram or Fb Stay to showcase merchandise in actual time and reply buyer questions.
- Use Shopify Collabs to attach with influencers, share low cost codes, and observe affiliate gross sales.
Optimize for search engine optimization
Be certain that your retailer could be present in search engines like google and yahoo:
- Use clear, keyword-rich titles and descriptions for merchandise and collections.
- Edit the search engine itemizing preview to write down customized meta descriptions for Google.
- Submit your sitemap to Google Search Console to get listed quicker.
Construct and develop your e-mail listing
For those who’re simply beginning out, e-mail would possibly turn out to be your most cost-effective gross sales channel. Use Shopify Varieties to gather emails on-site. Supply incentives like free delivery or a reduction in trade for signups. Ship common newsletters, promos, and new arrival alerts by means of Shopify E mail.
Run focused advertisements and observe outcomes
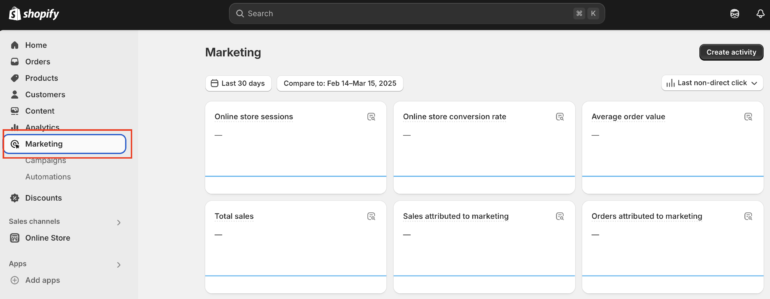
For those who’re able to spend money on advertisements, Shopify makes that simpler too: Use the Advertising tab to arrange Google Adverts, Fb Adverts, or e-mail campaigns.
Shops on Shopify Plus can use Shopify Audiences to create customized purchaser lists and export them to advert platforms like Fb for laser-targeted campaigns.
Run seasonal campaigns and flash gross sales
Shopify additionally helps you intend high-impact gross sales:
- Schedule seasonal or vacation promotions with customized low cost codes.
- Put together for giant site visitors spikes throughout flash gross sales by simplifying product pages and disabling non-essential apps.
- Create a branded password web page as a backup if it’s essential pause site visitors resulting from points throughout a significant occasion.
💡 Tip: For those who’re unsure the place to begin, use the Advertising > Campaigns tab to attempt Shopify’s pre-built templates for promotions, emails, and advertisements. No coding or design abilities required.
Promotion shouldn’t be a one-time factor; it’s an ongoing strategy of connecting together with your clients and rising your model. Subsequent, let’s take a look at the way to observe your retailer’s efficiency and optimize over time.
Step 10: Monitor and optimize your efficiency
Launching your retailer is just the start. You’ll want to take the time to trace what’s working, what’s not, and the place to enhance. Shopify consists of highly effective analytics and efficiency instruments constructed proper into your dashboard so you can also make sensible choices and develop confidently over time.
Right here’s the way to control your retailer’s efficiency:
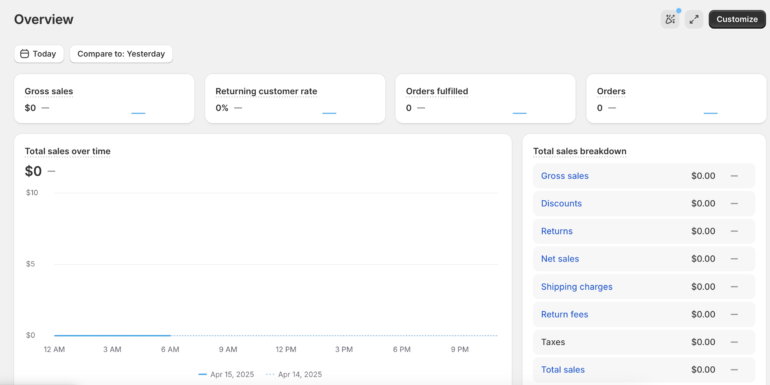
Use Shopify Analytics
Out of your Shopify admin, you may entry real-time and historic studies that observe:
- Gross sales by product so you may determine bestsellers and underperformers
- Visitors sources to grasp the place your guests are coming from (e.g., Google, e-mail, Instagram)
- Deserted carts to see what number of clients didn’t full checkout — and observe up with restoration emails
- Buyer behaviors like web page views, gadget varieties, and conversion paths
These insights aid you fine-tune your advertising technique, replace product listings, and enhance the general buying expertise.
Test your Internet Efficiency dashboard
Shopify’s Internet Efficiency dashboard evaluates your retailer’s pace and stability utilizing metrics based mostly on Google’s Core Internet Vitals. You’ll see:
- Loading time (how briskly your pages seem)
- Interactivity (how rapidly your website responds to clicks and actions)
- Visible stability (how easily content material masses with out shifting).
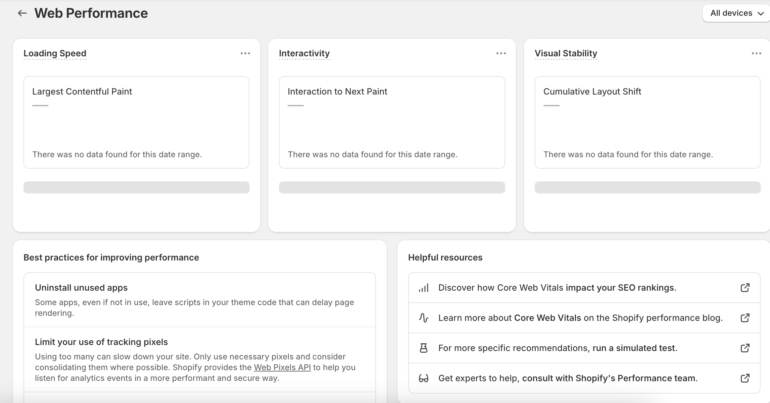
Enhancing website pace can instantly influence your search rankings and conversion charges.
For those who’re utilizing Shopify Plus, you’ll unlock deeper analytics, customized studies, and entry to automation instruments like Shopify Circulate — good for managing high-volume gross sales or B2B buyer segments.
Associated: Shopify vs Shopify Plus (2025): Is It Price Upgrading?
💡 Tip: Test your analytics at the least as soon as every week and after operating any main marketing campaign. Use what you be taught to check new concepts and double down on what’s working.
With this last step, you’ve obtained the instruments and know-how to not solely launch your retailer, but in addition to construct, market, and scale it like a professional.
FAQs About Beginning a Shopify Retailer
How a lot does it price to begin a Shopify retailer?
Organising a Shopify retailer sometimes prices between $300 and $600 upfront, which incorporates your Shopify subscription and non-compulsory add-ons like apps or premium themes. Anticipate month-to-month bills to begin round $75 to $150, relying on the options you utilize. For those who plan to promote in individual, you’ll additionally have to finances for {hardware} prices starting from $49 to $499, plus $89 per 30 days, per location for Shopify POS Professional.
Is Shopify value it for newbies?
Completely. It’s beginner-friendly, and the interface is intuitive. Plus, the built-in instruments aid you with delivery, taxes, funds, and extra — no coding wanted.
How a lot does Shopify take from a $100 sale?
For those who use Shopify Funds, the charge is about 2.9% + 30¢ per transaction on the Fundamental plan. So for a $100 sale, Shopify takes roughly $3.20.
Is establishing a retailer on Shopify free?
You can also make a Shopify retailer with a free trial. After that, you’ll have to subscribe to a plan to proceed promoting.
How a lot does Shopify cost per merchandise offered?
There aren’t any per-item charges, however transaction charges apply. For those who promote 10 gadgets in a single order for $100 whole, you continue to pay the flat proportion on the complete sale, not per merchandise.
How lengthy does it take to arrange a Shopify retailer?
You may technically get your retailer up in just a few hours, however count on to spend just a few days fine-tuning your branding, listings, and settings.
Are there any authorized necessities for establishing a Shopify retailer?
Sure, relying on the place you use. Widespread necessities embody registering your online business, establishing gross sales tax assortment, and together with a privateness coverage and phrases of service in your website. Shopify has templates to assist with these, however it’s sensible to seek the advice of an area advisor.
========================
AI, IT SOLUTIONS TECHTOKAI.NET